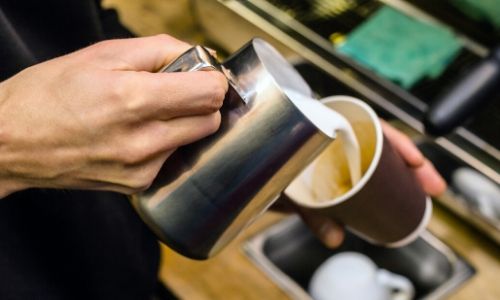
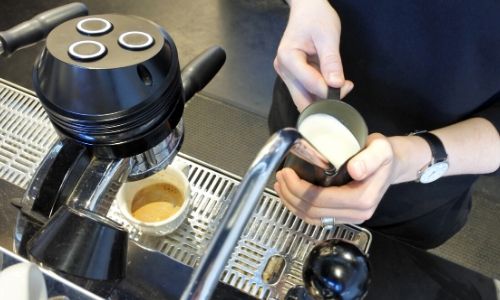
Adding milk to coffee is as old as coffee making itself. But it's only been in the past century or so that we've really taken a keen interest in how we add our milk to coffee.
And in the past couple of decades, we've also started caring whether said milk is dairy or plant based.
So there's a whole lot of discussion going on, and this post's meant to help you get the gist of what milk is meant to do to coffee, discuss its various forms, and give you a crash-course in steaming and frothing milk at home.
Table of Contents
Why do we add milk to coffee ?
The original reason for adding milk to coffee is really to help cut through all the strength and bitterness of coffee.
This is mostly due to the combination of proteins, salt, and fat that naturally occur in milk. They interact with the caffeine and coffee solids in brewed coffee to sort of round off the edges.
Whether coffee was poorly made back when we first discovered it, or whether people have always liked their coffee a little milder, no one knows.
But this is the end result, and I think many people are happy about this.
Today adding coffee to milk has literally transformed into an art. Making patterns with steamed milk in cappuccinos is a thing, and there are so many kinds of milk we can use.
Milk's purpose today is both for aesthetics and flavor, and I think we're pretty much at its peak popularity.
Now let's talk about the various forms milk can be found in, in a cup of coffee.
So what is steamed milk ?
Steamed milk is what you'll most often see on the ingredient list of most espresso-based drinks.
It might sound nondescript, but it's actually literally steamed milk. Meaning, milk that's been subjected to very hot steam, and thus heated.
That hot milk is what's going to mix with the actual liquid espresso in your drink. The foam will sit on top and mix with the crema.
Actually, if we want to be very clear with what happens to the milk, the story is a little different.
When introducing the steam wand into the milk pitcher, you will get two kinds of milk in various ratios.
One is milk froth, the result of the hot air added into the milk by the wand. Most commonly found at the top of the milk. The denser the froth, the lower it is in the milk pitcher.
The froth that forms on the very top is the dry foam, and what is usually put on the very top of drinks (more on that in a minute).
At the very bottom you get hot milk, that hasn't frothed and there's no point in trying to further froth it. You risk burning the milk if you work it too much.
Wait, you can burn milk ?
Yes, you have to be very careful what temperature you get your steamed milk to. Too hot and it can totally burn and get you a smoky taste, which is no one's favorite.
Ideally, the temp for steamed milk should be 55-65 C/130 - 150 F. And yes, nearly all baristas check it with a thermometer.
And what happens if you don't burn the milk, aside from a bad taste ?
You ruin the protein bonds in the milk. When protein is exposed to heat, it bonds with its fellow protein cells. This creates a sturdy structure, which holds the foam together (regular or microfoam).
So when those bonds are burnt, the foam will also fall apart. Which means you've wasted milk, time, and energy.
But this happens to all baristas. Everyone goes through a learning curve, and everyone ends up burning the milk. Otherwise you won't know when to stop, aside from reading the thermometer.
Okay, then what's microfoam ?
Microfoam is the in-between, not milk froth but not liquid milk either.
It's a type of milk froth that's so very, very fine that it's more like a thick milk that's full of the tiniest air bubbles possible.
This process happens naturally when steaming milk, but the amount you get depends on your skill as a barista and he amount of fat in the milk used. More on that in a bit, I promise.
So, in some drinks - like the flat white - you'll need microfoam, and that's it. No steamed milk and no milk foam. Just straight-up creamy milk and that's not really easy to achieve.
You'll never get all the milk in the pitcher to turn into microfoam, but you can get a lot of it to turn.
For the most part, microfoam is achieved when the nozzle of the steam wand is further down into the milk. Not at the bottom of the milk, but not at the top either.
The closer you are to the top of the milk, the more regular form/milk forth you're going to get. And that's just not as creamy as microfoam.
So steamed milk isn't microfoam ?
Nope. It's just the hot milk that's leftover from making milk froth.
It contains less proteins and fat than regular milk, because they're all (well, most) in the foam, holding it together.
I doubt anyone cares about that, but there you go. Fact of the day.
What's this about 'dry' foam ?
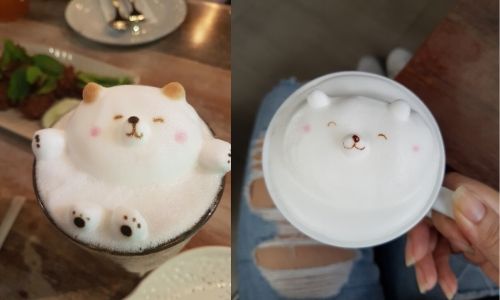
Ah, the dry foam. Pretty much the opposite of microfoam.
Where microfoam is thick, dense, 'heavy', and looks so shiny and liquid-like, dry foam is anything but.
It looks a lot like dishsoap foam, except it's milk. It's basically microfoam with much larger air bubbles, which 'dries' it out and reduces shine and structure.
You can kind of see through it, and it's what many coffee chains will serve on top of cappuccinos.
Hence the 'dry' and 'wet' cappuccino discussion.
The dry foam is always found on the top of the milk pitcher (more air bubbles) and is formed when the nozzle of the steam wand is near the top of the milk.
How much milk do I need ?
It depends on what kind of milk you're using, what's your target volume, and what kind of foam you're looking for.
Generally speaking, cow milk tends to double in size during steaming/frothing.
So if you need to cover 4 oz/120 ml of volume, then you'd be needing just 2 oz/60 ml of liquid milk.
However, some milks tend to froth a little more, and two baristas can get more or less froth out of the same milk, depending on their skill.
Does fat milk froth better ?
Yes, generally fat- heavy milk is going to provide you with more froth. It's the fat and protein that helps bind the foam into a stable structure.
If you get skinny milk, you'll need to work it for much longer than 2% milk, since it has less fat but also less protein. You may also need to use more milk to get those two ounces of froth we were talking about earlier.
Overly fat milk doesn't get too fluffy or doubles in size - like half and half for example - but it creates more of a microfoam than anything.
If that's what you're going for, go ahead. Fat weighs down the bubbles and helps create a really good microfoam, but it won't be very helpful if you want to make froth or dry foam.
Does plant milk froth the same as regular milk ?
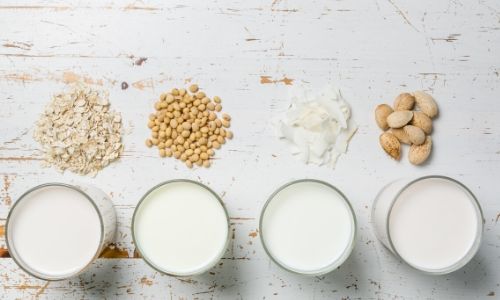
It really depends on what kind of milk you're using.
Nut-based milk tends to have more protein and fats than any other plant milk. This makes frothing very easy, very much like dairy.
Good examples are coconut milk, almond milk, cashew milk. All are protein heavy but also have a fair amount of natural fats, meaning they'll froth very well.
Other milks, like rice milk or oat milk or quinoa milk are 'lighter' and may not respond as well to steaming, meaning you'll have a harder time working with them.
As for soy milk, which has been around for ages now, it foams very well. But it also depends on the company you're getting the milk from. Often you'll find soy milk with stabilizers added, which helps a lot with frothing.
But when it lacks those ingredients (i.e. natural soy milk) it might be a little harder to work with.
It's still loaded with protein, so there will be foaming, but the degree will vary from brand to brand.
My froth is falling apart, help !
Froth can and does fall apart from time to time.
There are things you need to take into account when figuring out what happened, because it might be just one factor, or several.
The first reason your froth might fall apart is low temperature. Not working the milk enough and keeping it too cool will not help the protein bond together and create stability in the foam.
This means the froth will not be able to keep it structure unless you continually mix it and add more steam, and when you stop it will fizz in a matter of seconds.
In this case, heat your milk a little longer, and be sure to use a thermometer. The ideal range is somewhere between 55-65 C/130-150 F. Most milks will keep their froth at that temp.
Another possible reason is that your milk is too skinny. This is because milk that's been skimmed has the fats removed, but also a portion of the protein.
You need both fat and protein in order to create a stable foam, so try and get a fatter milk.
Most baristas swear by 2% milk (dairy), and the higher the percentage is the better your chance at getting microfoam. Of course, if you're looking to create dry foam you shouldn't get fatty milk.
And finally, another reason your may not be able to create a good enough froth is that you simply need more practice.
Keep in mind that steaming and frothing milk takes time and skill. Building that skill requires a lot of trial and error on your part, and possibly some experimenting.
Whether you're keeping the steam wand too deep in the milk or too close to the surface, or you work too aggressively, or you simply need more time to train your eye on what good froth looks like, it's okay.
We all had to start somewhere and you just need to keep practicing. Maybe sneak a peek at baristas when you're out ordering coffee, see if there's something they do that you never thought of doing.
It might bring you new ideas.
How to steam milk at home
Steaming milk is pretty straightforward. It takes a lot of getting used to, training your eye to know when the milk's done, but it's a fairly simple process.
You'll need a few items:
- milk jug, a medium one about 20 oz/600 ml
- cold milk, whichever you like
- a functioning steam wand
- (optional) thermometer
- clean, damp cloth
- clean towel/tissues for spills
Let's talk a little about that thermometer.
It's not mandatory, but in the beginning you'll find it very very useful.
It's a lot like knowing when to stop boiling water so you can add the tea leaves. You need a certain temp range, and in time you'll get a pretty accurate estimate of it by just looking at the top.
Same goes for steaming milk. In the beginning you'll need a thermometer (one of those candy thermometers with a long prong) to asses whether you milk's hot enough or not.
In time, your eyes will get used to what 30 C/86 F milk looks like, 45 C/113 F, and so on until you can tell the temperature by looking at it. It takes years of practice, but it will come in time.
Of course, it's okay to use a thermometer at all times. It's the most accurate reading ever.
Now let's start steaming that milk.
Prep your steam wand
Get your espresso machine ready and heated. You won't really need to brew espresso now, so you won't have to wait as long for the whole machine to heat up.
But you'll still need to wait a few minutes for the water to get up to temperature and most of the elements to be hot.
Once the machine's ready, run the steam wand for a couple seconds on its own.
This will clean it from the inside and make sure it's ready for the milk.
Wipe the wand after you're done, with the damp cloth. If everything's alright you should only have a few drops of water to wipe.
Add milk to jug, leave lots of room
Get your cold milk and add it to the clean, cold jug.
Keep in mind that most types of milk will double in size when steaming and frothing.
This means that you should be working by volume, not weight. What does this mean ?
If you need to add 6 oz of steamed milk and milk froth to a latte, you will obtain them from just 3 oz of cold milk.
Part of that milk will be actual liquid milk, and part of it will be froth, What's important is that you fill the drink by volume. If you were to add 6 oz of milk froth by weight, it would turn into a very large drink.
Also remember to leave plenty of room for your milk to expand. Never fill the jug more than half, try and keep it a little under half.
Otherwise when the milk expands and you have to maneuver it, things will get very complicated.
Steam milk, check temp every now and then
Once you've got the wand ready and the milk in the jug, turn the wand on again.
Carefully introduce the jug to the wand, and try to avoid splattering. This is another reason you should leave plenty of room in the jug.
With the steam running, adjust the jug's position so that the tip of the wand is halfway down the milk.
Slowly move the jug up and down the steam wand, while keeping it at a slight angle. This will help move the milk in a circular motion. Don't overdo it or you might lose more bubbles than you make.
The beginning might be a little messy, don't worry about it tho.
Keep turning and moving the milk jug along the wand to make it double in size.
You'll notice bubbles forming on the top of the milk, larger ones. Those can be encouraged and you will get mostly dry foam this way. If that's what you're after, keep the nozzle close to the surface of the milk.
If you're after microfoam, keep it closer to the bottom of the milk.
Whichever you're after, remember to move the jug up and down every now and then to keep the temperature even.
Get your thermometer and check the temperature. It should be between 55-65 C/130-150 F.
Don't use it as a set rule, because each milk is different, each steam wand is different and the final temperature is more of a guideline rather than a fixed rule.
Do use it to guide yourself by, like if your milk looks a little flat and you notice it's too cold, keep working it.
Stop when you have enough milk
How do you know when you should stop ?
For the most part, it's when you have enough milk to accomplish what you were trying to do. Sometimes you might end up with a little more milk than you anticipated, like if your milk tripled in size for example.
Some brands of soy milk tend to be really expansive like that.
If you've got to the maximum temp and it still doesn't look like enough milk, you should still stop.
If you push it further you risk burning the proteins in the milk and ruining the structure of the foam.
You can try using a more protein-heavy milk next time, or a higher fat percentage one.
When you're done, make sure to gently swish the milk in the jug a little. This will do two things:
- make you look like you're really good at this, if someone's watching
- mix the bubbles together really well
Then, to establish dominance in the barista field, tap the side of the jug firmly but not too firm on the side of a counter or a friend's elbow.
This will remove any overly large bubbles that may ruin your final product.
In the end you should be left with varying levels of:
- steamed milk - the hot, liquid part
- microfoam, even just a little
- dry foam, on the very top
How much of each you end up with will depend on how you've maneuvered the milk jug and where the nozzle went most of the time.
Conclusion
Steaming and frothing milk is one hell of a job. It takes a lot of practice and you'll mess up a lot in the beginning.
When that happens, remember that if you can't make a latte with that milk, you can always just make cafe con leche/cafe au lait and call it a day.
If you want to know more about coffee or tea, feel free to check the related articles below. Who knows what else you might find ?

